In my work and in my life I take a lot of screenshots. A LOT of them. According to my logs, I take anywhere from 10-35 per day, half of which are usually annotated in one way or another.
Generally speaking, I need to create these on the fly. Whether it’s for Engineering Happiness or showing my wife that I did something cool, I need to make them quickly.
I’ve found an amazing combination of little apps that has made this process super simple, quick, and magical.
First and foremost, the best way to take a screenshot on a Mac is Cmd+Shift+4. This allows you to select the area of the screen and automatically save it to your desktop.
Cool, right? Well, sort of.
By saving an average of 22.5 screenshots to my desktop per day, I’d have to make cleaning up part of my daily routine or else I’d be overwhelmed with a messy desktop at the start of each day. Boo to that.
Luckily, we can fix that pretty easily with a Terminal command. The Terminal can be found under Applications → Utilities on your Mac.
 I’ve created a folder on my desktop called Screenshots where all of my screenshots are automatically saved. If you want to do the same, launch the Terminal and enter this command (after you’ve created the folder, of course):
defaults write com.apple.screencapture location ~/Desktop/Screenshots/
To make this stick, you need to enter one more command which is:
killall SystemUIServer
After you’ve done that, go ahead and give it a whirl. Cmd+Shift+4 yourself away and watch all of your screenshots be saved to a folder instead of directly to the Desktop.
Now that we have that out of the way, here’s where the amazing happens:
Awesome Screenshot is a screenshot annotation add-on for your favorite browser. I personally use the Firefox version, but they also have versions available for Chrome and Safari. This add-on allows you to capture all of the screen or part of the screen and circle, point, and text your way to descriptive annotations. It is super intuitive, and I’d recommend it to anyone. Oh, and it’s totally free.
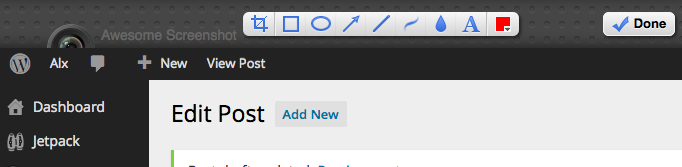
Awesome Screenshot at work
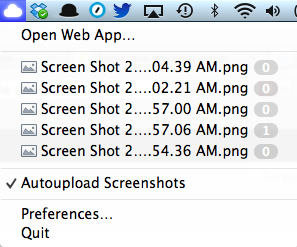
Cloud App Menu
Cloud App lets you upload and share files really easily. One of the most amazing features is Auto Upload Screenshots, which means that each time you take a screenshot it automatically gets uploaded to your account and given a URL, which is automagically copied to your clipboard for easy sharing. You can upload and share almost any type of file with it, which is equally awesome. Another cool thing is that you can use your own URL with it so that your sharing is more personal. I use the URL http://im.alxb.co for my screenshots. They do have a free version, but I’ve found the need for the Pro version which is $3.75 per month. Totally worth it.
Now each of these on their own is super powerful and helpful in many ways, but what happens when you combine them? Magic. That’s what happens.
The flow of it is pretty simple, but totally powerful:
You’re on a page where you want to point something out to someone and you simply click the Awesome Screenshot icon in your browser. This opens up a new tab, where you can annotate away, making your screenshot. . . um. . . awesome. The next step is to Cmd+Shift+4 that puppy so it’s automatically saved to your Screenshots folder and uploaded to Cloud App. Once it’s automatically uploaded to Cloud App, you have a nice neat URL copied to your clipboard, ripe for sharing. Magic, I tell you, magic.
Here’s a quick video of the flow. It takes no time at all, and works great for quick sharing of ideas (Full-screen this bad-boy to really see it in action):

That’s what i’ve been looking for. Thanks!
LikeLike